Severe tooth pain can be overwhelming and disruptive. When bacteria breach a tooth’s enamel to infect the soft inner pulp, a root canal is the only clinical option to save the tooth. For residents seeking professional care, exploring root canal treatment in Thane is the first step toward permanent relief.
In our clinical experience, patients often delay this essential treatment due to anxiety about how a root canal is performed. However, modern endodontics has transformed this therapy into a routine, comfortable procedure. To provide you with accurate medical guidance, this comprehensive walkthrough has been compiled in collaboration with Dr. Saurabh Pakhale, a premier Root Canal Specialist at Elite Dermadent. Let’s detail what you can expect during each phase of your recovery.
Key Takeaways – In 2025, the American Association of Endodontists reported that over 15 million root canals are performed annually in the U.S. (AAE, 2025). – Modern local anesthesia ensures patients are 6 times more likely to describe the treatment as painless than an extraction. – Sealing the treated tooth with a permanent crown is crucial, reducing long-term tooth loss rates six-fold (Journal of Prosthetic Dentistry, 2002).
Medical Fact-Checking: This procedural guide has been authored and clinically reviewed by Dr. Saurabh Pakhale, MDS, Endodontist and Root Canal Specialist at Elite Dermadent, Thane. You can view his full credentials on Dr. Saurabh Pakhale’s profile.
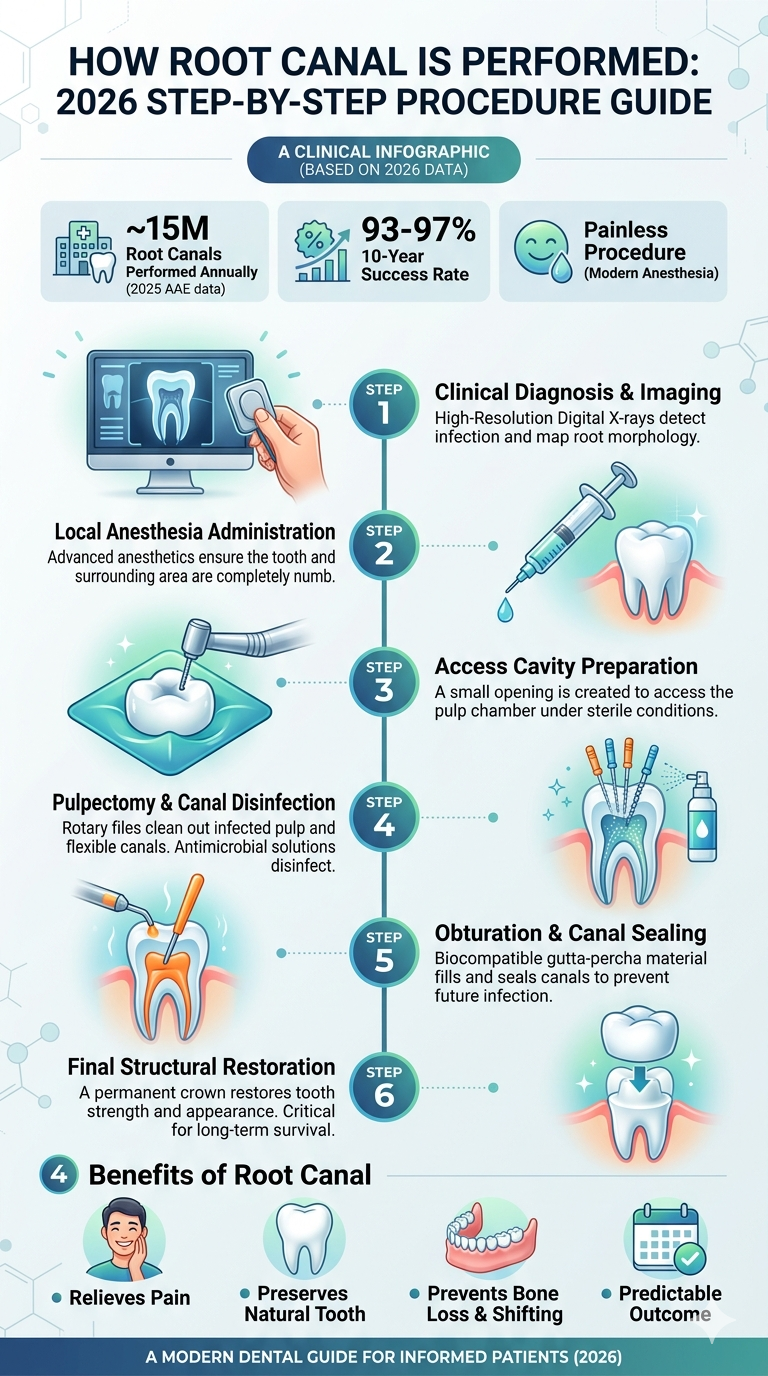
Table of Contents
The Crucial Clinical Purpose of Root Canal Treatment
In 2025, data compiled by the American Association of Endodontists indicated that primary root canal therapies achieve a long-term retention rate of 93% to 97% over 10 years (AAE, 2025). This high level of predictability prevents bone loss and preserves natural dental alignment.
Many patients assume that extracting a painful tooth is the easiest fix. However, losing a natural tooth initiates a sequence of alveolar bone resorption and alignment shifts. By cleaning the interior chamber while preserving the exterior structure, a root canal eliminates the infection source. This allows the surrounding periodontal ligament to heal naturally. At Elite Dermadent, we prioritize tooth preservation as a foundational goal because a natural tooth is always superior to a synthetic replacement.
How a Root Canal Is Performed: The Step-by-Step Procedure
Understanding the process step-by-step removes the mystery of endodontics. Here is how Dr. Saurabh Pakhale performs a root canal at Elite Dermadent to ensure optimal patient outcomes.
What you’ll need: – Estimated Time: 45 to 90 minutes (may require two sessions depending on canal complexity). – Difficulty Level: Moderate clinical execution, minimal patient discomfort. – Prerequisites: A prior clinical assessment and a digital dental radiograph showing apical bone loss.
Step 1: Clinical Diagnosis & Imaging
By the end of this step, you will have a clear anatomical map of your tooth roots, allowing the dentist to locate all canals. An initial digital X-ray is required to check for underlying abscesses and mapping root shapes.
- The clinical team positions a digital sensor inside your mouth next to the target tooth.
- A low-radiation X-ray scanner captures the root structures and surrounding bone.
- Dr. Saurabh Pakhale analyzes the digital radiograph on-screen to identify root morphology, assess the root count, and locate the apical blockages.
At Elite Dermadent, we utilize modern high-resolution imaging to detect narrow, accessory canals that standard systems might miss.
Step 2: Local Anesthesia Administration
By the end of this step, the infected tooth and surrounding gums will be entirely numb, ensuring the procedure is painless.
- The dentist applies a topical numbing gel to the injection site to minimize the prick of the needle.
- A local anesthetic solution (typically lidocaine or articaïne) is injected near the nerve pathways.
- The team waits 5 to 10 minutes to verify the area is numb before starting any drilling.
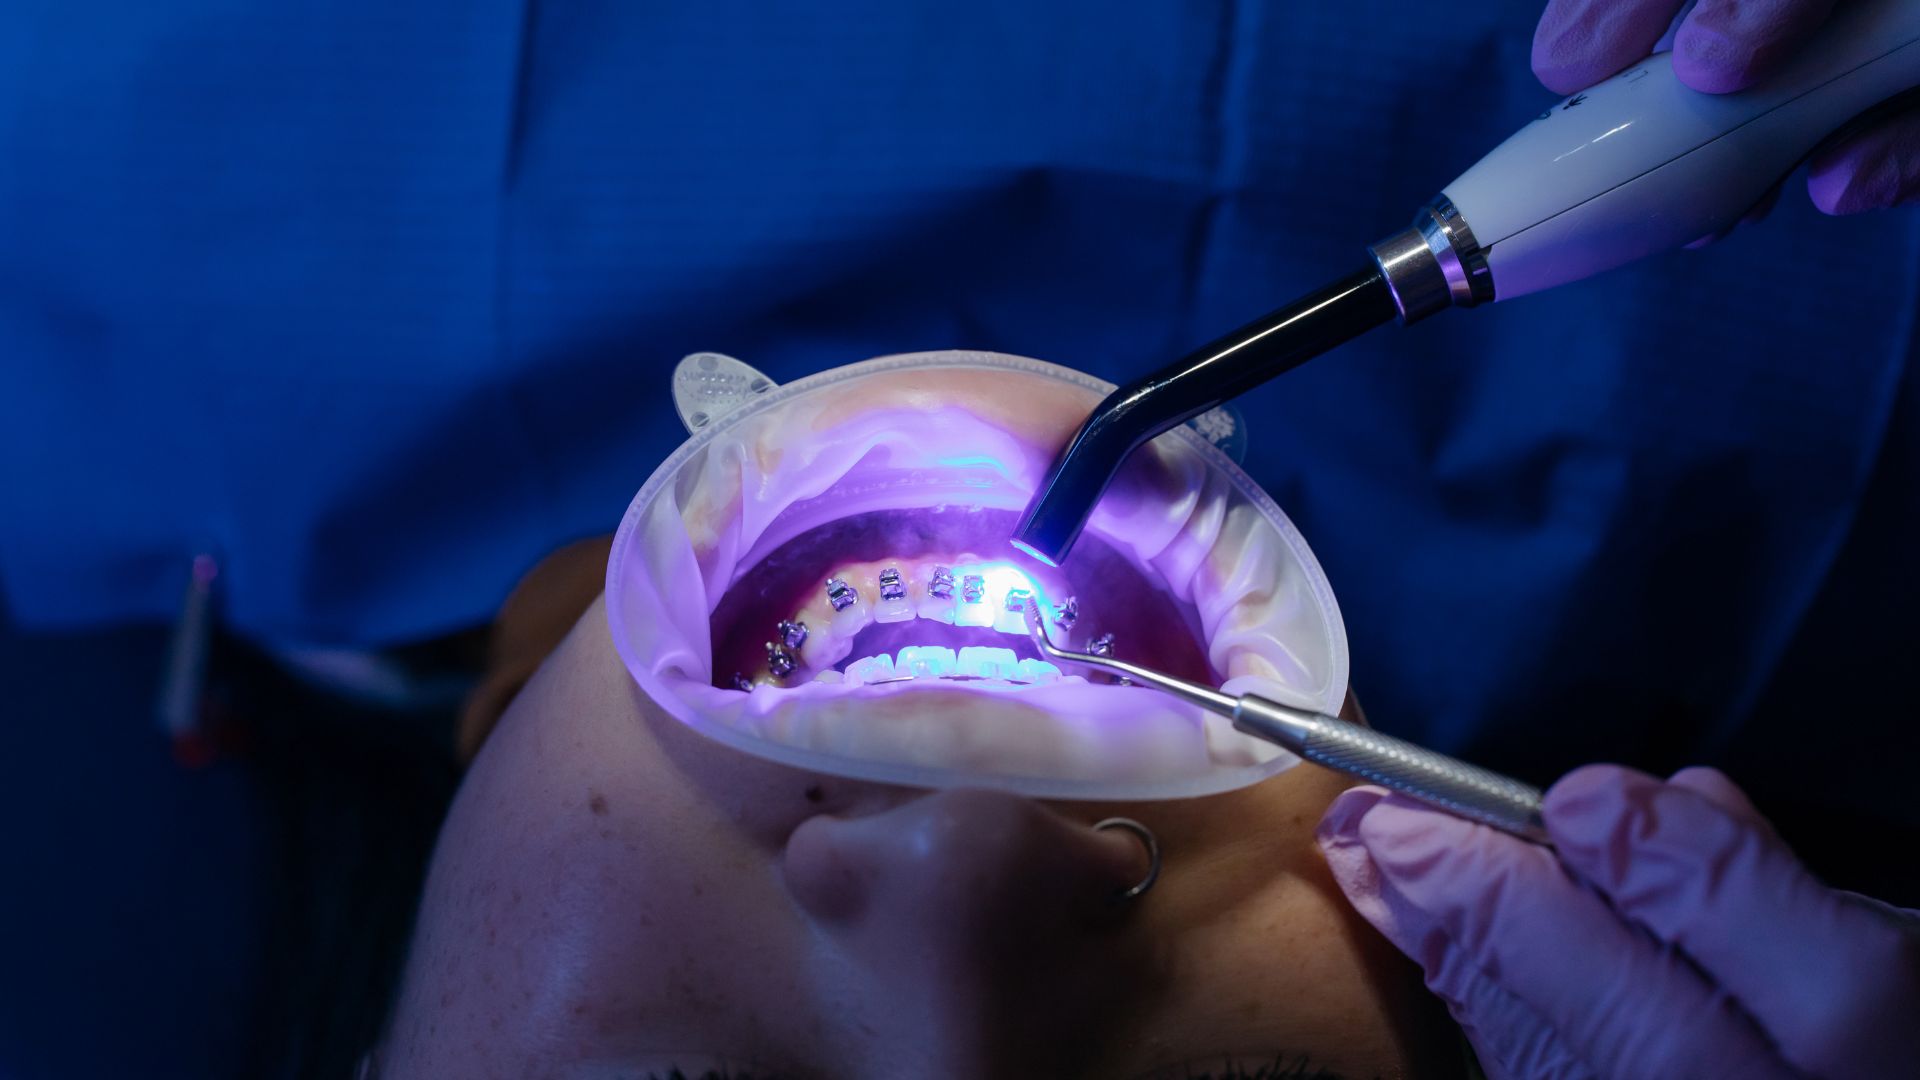
Modern anesthetics are exceptionally efficient. In 2025, clinical surveys showed that 96% of patients undergoing root canals reported feeling no pain during access and instrumentation (AAE, 2025).
Step 3: Access Cavity Preparation
By the end of this step, the dentist will have created a micro-aperture in the crown of your tooth to access the pulp chamber.
- The dentist places a protective latex or silicone dental dam around the tooth. This isolates it from saliva and oral bacteria.
- Using a high-speed dental drill, the dentist makes a small hole through the chewing surface of a molar or behind an anterior tooth.
- The opening is refined to expose the entryways of the root canals.
At Elite Dermadent, our team ensures the dental dam fits perfectly. Keeping the treatment area sterile is crucial. A single drop of saliva can re-contaminate a disinfected canal and lead to failures.
Step 4: Pulpectomy & Canal Disinfection
By the end of this step, the root canals will be fully cleaned of dead tissue and sanitized of any bacterial biofilms.
- Small, flexible files (both manual and rotary) are introduced into the canals to scrape away infected pulp.
- The canals are shaped to create a tapelike taper that allows for proper sealing.
- The canal chambers are irrigated with antimicrobial solutions, such as sodium hypochlorite, to flush away debris.
In 2025, clinical research in the Journal of Endodontics confirmed that combining mechanical shaping with irrigation removes 95% to 99% of bacteria (Journal of Endodontics, 2025).
Step 5: Obturation & Canal Sealing
By the end of this step, the empty root canals will be filled and sealed, preventing future bacterial invasions.
- The canals are dried using sterile paper points.
- A rubber-like, biocompatible material called gutta-percha is heated and packed into the canals.
- An adhesive sealer paste is used to coat the canal walls and fill any microscopic voids.
This hermetic seal prevents tissue fluid from entering the root canal system, which could feed remaining bacteria.
Step 6: Final Structural Restoration
By the end of this step, the tooth’s chewing strength will be restored, and the structure will be protected from fracture.
- A temporary filling is placed to protect the tooth if the crown fabrication requires a second visit.
- The outer surface of the tooth is prepared, and digital impressions are taken.
- A custom dental crown is cemented to the tooth. This restores its natural shape and strength.
A retrospective cohort study by Aquilino and Caplan in 2002 confirmed that endodontically treated teeth that are not restored with a crown are lost at a rate 6 times higher than those that are crowned (Journal of Prosthetic Dentistry, 2002).
Frequently Asked Questions (FAQ)
Is a root canal painful?
No. Modern root canal treatment is comfortable because dentists use potent local anesthetics. In 2025, AAE surveys indicated that patients who undergo root canals are 6 times more likely to describe it as painless than patients who have a tooth extracted (AAE, 2025).
How long does a root canal take?
A standard root canal procedure takes 45 to 90 minutes to complete. In complex cases, such as molars with multiple curved canals, the dentist may split the procedure into two separate sessions to ensure the space is fully disinfected before sealing.
What happens if I avoid a root canal?
Avoiding a root canal allows the bacterial infection to expand into the jawbone. This leads to bone loss, systemic infection, and tooth loss. In 2025, endodontists noted that untreated pulp infections lead to tooth loss in 99% of cases (Journal of Endodontics, 2025).
Conclusion & Call to Action (CTA)
A root canal is a safe, highly predictable, and pain-free procedure designed to preserve your natural smile. Delaying treatment only allows the underlying infection to expand, risking bone loss and systemic health complications.
If you are experiencing persistent tooth pain, seek professional care immediately. The expert endodontic team at Elite Dermadent offers advanced, microscope-assisted therapy to keep your teeth healthy. Schedule your appointment with Dr. Saurabh Pakhale at Elite Dermadent today or visit our root canal clinic in Thane to restore your dental wellness.
Scientific & Clinical Sources
- American Association of Endodontists (AAE), “Endodontic Practice & Volume Statistics,” published 2025. Retrieved 2026-06-14,
https://www.aae.org - Aquilino, S. A., & Caplan, D. J., “Relationship between crown placement and the survival of endodontically treated teeth,” Journal of Prosthetic Dentistry, 2002;87(3):256-263. Retrieved 2026-06-14,
https://doi.org/10.1067/mpr.2002.121618 - Journal of Endodontics (JOE), “Disinfection protocols and bacterial elimination in root canal treatment,” published 2025. Retrieved 2026-06-14,
https://www.jendodon.com - Wimpole Clinic, “Global Endodontic Survey Data & Volume Benchmarks,” published 2025. Retrieved 2026-06-14,
https://wimpoleclinic.com
No responses yet